Are you trying to use a bot but it does not work as expected? Maybe this problem can be solved by changing app-settings or by a change in the bot code. There might be people on the forum who have more experience with this bot and can help you, but they will need some information about your case to do so. This guide explains how to collect and share information about your case so that other people can help you.
Bot development begins by identifying a situation in which the bot should act. The same applies if we want to add new functionality to or fix a problem in a bot: In both cases, we observe a situation in which the bot acted differently than it should.
Because the bot perceives the game world trough screenshots, we use screenshots to describe this situation.
In simple cases, the most recent screenshot is sufficient to decide what to do in the game. In other cases, the bot needs to account for information which is not visible in the last screenshot but was visible in an earlier screenshot. In this case, we use a sequence of screenshots to describe the situation.
After describing a situation the bot could encounter, the next development step is to explain how it should act in this situation. A bot can act by sending mouse movements, mouse clicks, and keyboard key presses to the game client.
We can use the following steps to take a screenshot and save it to a file:
- Install the Windows app
Paint.NET. You can download it from Paint.NET - Download - Take a screenshot of the game client window using the Windows keyboard command with keys
ALT+Print. This copies a screenshot into the Windows clipboard. - Open the
Paint.NETapp and press the keysCTRL+V. This copies the screenshot from the Windows clipboard into the app. You can then see the screenshot in there. - Use the
File→Save Ascommand in Paint to save the screenshot to a file.
In some cases, we might want to reduce the size of the image or the file size. Even after the screenshot has been taken, we can use these additional steps to optimize the result:
- To get a smaller image, you can crop the screenshot to remove the window title bar and the window border. You can do the cropping also in the same app. To crop, you can use the tool to select a part of the image and then the tool to
Crop to Selection. - To get an image file with a smaller file size, you can choose
JPEGformat in theSave Asdialog and then pick a compression level of90. This will often result in a smaller file size then usingPNGorBMPformats.
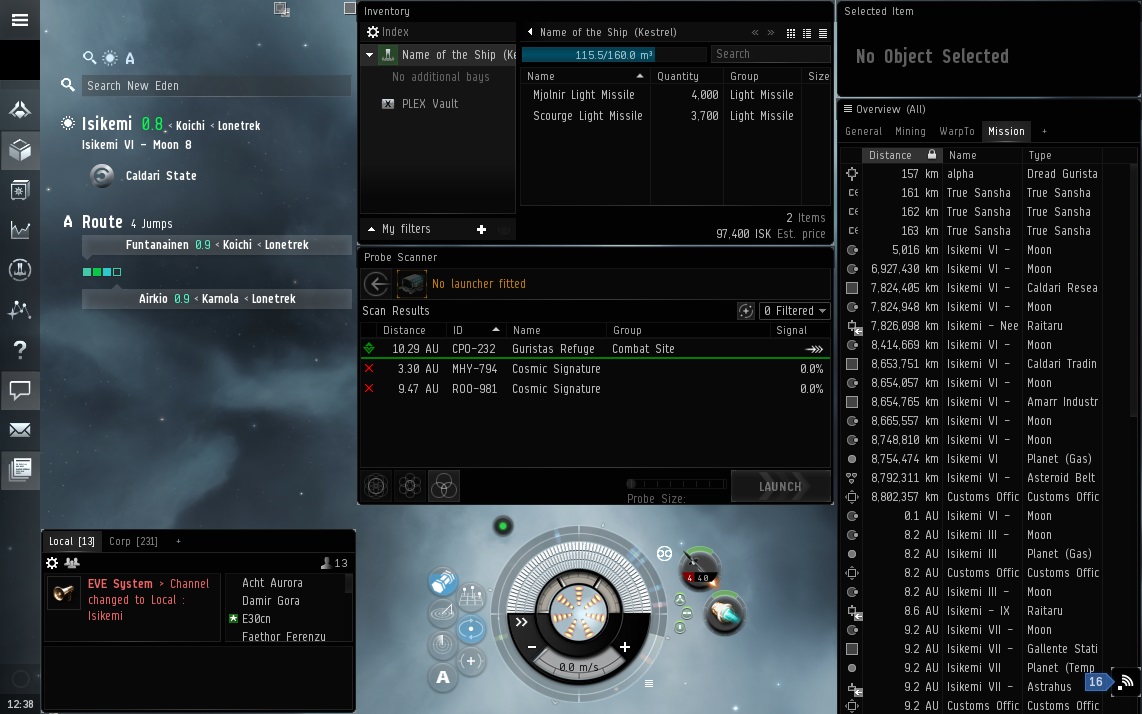
In this example, you can also see I applied the optional steps to get a smaller image and a smaller file size.
The example at bots/2019-06-26.eve-online-screenshot.jpeg at a6b02d4119882d98ce505b852ef525242b527fff · Viir/bots · GitHub shows an image that we can use for the purpose of developing a bot.

When we have a screenshot, the next step is to define what input the bot should send to the game client in this situation:
- Should it move the mouse cursor somewhere or use a mouse button to click?
- Should it press or release keyboard keys?
- Or should it do nothing?
Getting Mouse Coordinates
To get coordinates of a location in a screenshot, we can use paint.net. This app displays the position of the mouse cursor in the coordinate system of the image in the status bar. As you move your mouse cursor over the image, you see these coordinates changing:
![]()
You can use these coordinates to specify a location for a mouse input.
Sharing Image Files
To share the image files of the screenshots, Github is the most popular option. I also used Github for the image above. Another option to share images is https://imgur.com
Linking Images on the Forum
Properly adding screenshots to your post on the forum is a good way to improve responses there. Do not upload the image on the BotEngine forum, because file size limits are small and the forum software automatically resizes the image. Instead, link the image with an URL to Github or imgur as I have done above.